Index
Setup and Everyday Use
Setting up the Rikomagic RKM M36 is as simple as it gets. Just plug in the power supply, input devices and connect it to your TV or monitor via HDMI. It’s ready to go in a matter of minutes.

It’s not quite as portable as some micro PCs, let along stick PCs, but it has a couple of advantages. We already talked about the spacious chassis that can easily cope with the heat generated by the Bay Trail SoC, but that’s not all. The power button, two USBs and audio are located on the right side for ease of access, and this was a good call on Rikomagic’s part. You don’t have to mess around to connect a USB stick or any type of peripheral. It might not be as portable as a stick PC, but it is a bit more practical as an everyday office machine or an HTPC.
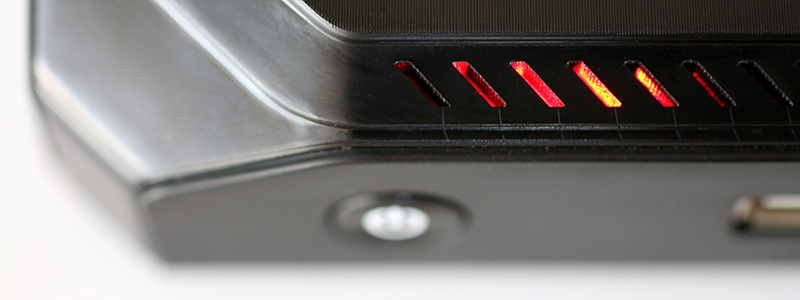
The only problem with the layout is that you still can’t see an activity LED on the front, but it’s there – buried in the vents above the power button.
Another problem that plagues virtually all Bay Trail micro PCs, including Intel’s own Compute Stick, is the fact that overscan controls aren’t available. With many older monitors and some TVs, they would have been very helpful. Still, this shouldn’t be much of a problem for most users, although it is worth having in mind, especially if you want to use the system on a few different screens.
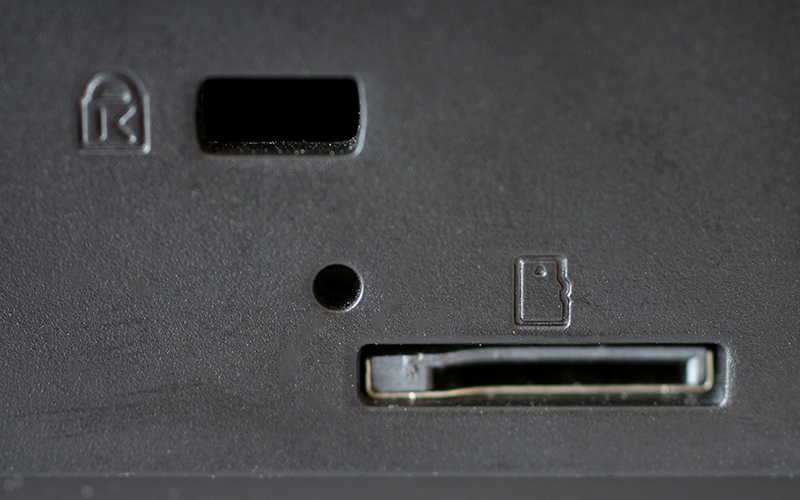
There is also one other thing worth mentioning. Bay Trail micro PCs aren’t capable of powering most external hard drives, since they simply lack the juice to do it. You should have no problem with other forms of external storage, including micro SD cards, USB sticks, or powered external hard drives.