Featured Articles

Intel plans Haswell refresh in Q2 2014

Intel plans Haswell refresh in Q2 2014

Intel has been executing its tick tock strategy flawlessly since January 2006 and now there is some indication that we might…

More...
Xbox One demoed running GTX card

Xbox One demoed running GTX card

It looks like the Xbox One just cannot catch a break. We have stumbled upon a report claiming that Xbox One…

More...
Haswell Pentium and Core specs surface

Haswell Pentium and Core specs surface

Haswell is out and now we have the complete specs for Intel’s first batch of fourth generation Core parts, as well…

More...
EVGA GTX 770 ACX 2GB previewed

EVGA GTX 770 ACX 2GB previewed

Nvidia is hoping that the Geforce GTX 770 will be a very popular product, and EVGA obviously share this view, as…

More...
Gainward GTX 770 Phantom reviewed

Gainward GTX 770 Phantom reviewed

Gainward has now officially unveiled its custom version of the Geforce GTX 770, the Gainward GTX 770 Phantom. Based on the…

More...
Frontpage Slideshow | Copyright © 2006-2010 orks, a business unit of Nuevvo Webware Ltd.
Monday, 08 October 2012 17:33

Nanoxia Deep Silence 1 computer case reviewed - Top panel

Written by Sanjin Rados

DS1-thumb top-value-2008-lr

Review: Bag of tricks does the trick

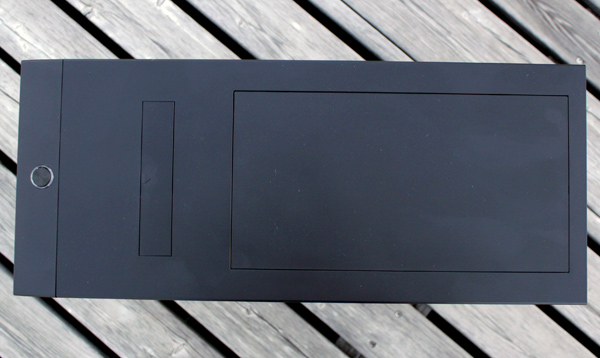
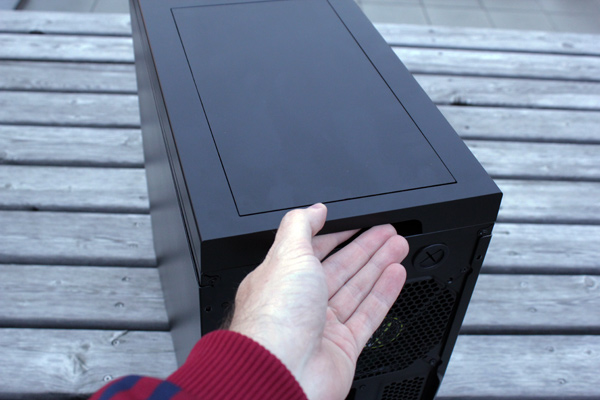
The top panel is sealed off for the computer to be as quiet as possible. Another important feature the Deep Silence 1 is the Air Chimney, which provides additional passive cooling from the top panel. Keeping it closed will maintain the uniform design and silence.

top0

top3

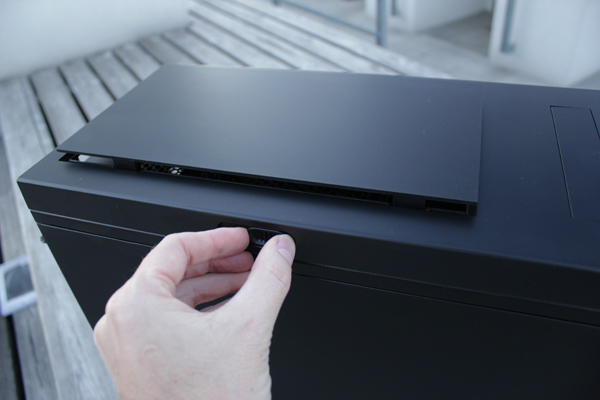
The Air Chimney can easily be opened or closed using the slider on the side of the top cover.

top4

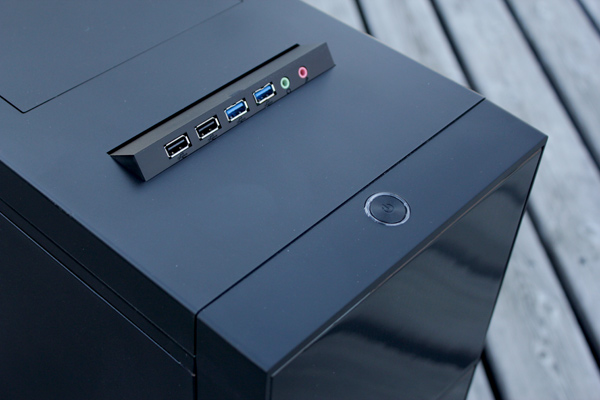
The Deep Silence has two USB 3.0 connectors, two USB 2.0 connectors and audio in/audio out jacks.

The I/O panel can be retracted into the case when not in use, a gentle press until a click will do. ON/OFF is the only key that’s not hidden.

top5

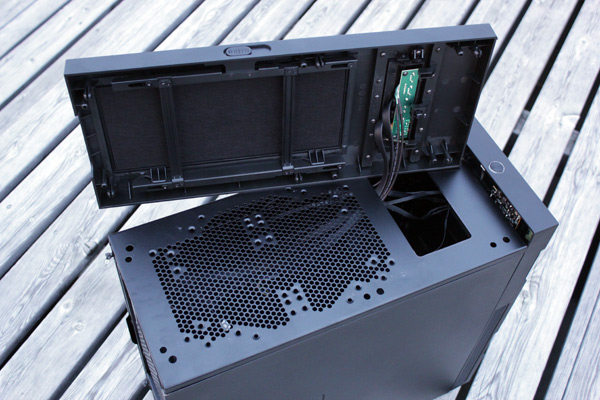
The top panel can house two 140/120mm fans. Setting it up requires taking off the top lid. It is done by holding the recess provided at the rear of the case and pulling it upwards with a firm tug. It didn’t take much effort, and the same goes for the front panel.

top6

The fan should be held inside and secured to the top by fastening the screws from the outside. The fans can be connected to the supplied fan controller.

top7

(Page 4 of 9)
Last modified on Wednesday, 10 October 2012 17:28
blog comments powered by Disqus

To be able to post comments please log-in with Disqus


Facebook activity

Latest Commented Articles

Recent Comments