Index
Colossus is a large and comfy case and we had no trouble in equipping it with our test hardware. However, we had a few complaints so we’ll start with those.
Testbed:
Motherboard: MSI P35 Platinum
Motherboard: EVGA X58 FTW3
Processor: Intel Core 2 Extreme x6800, Intel Core i7 930
CPU-Cooler: CoolerMaster Hyper Z600
CPU-Cooler: Prolimatech Armageddon
Graphic Card: Gigabyte’s passively cooled Geforce 9800 GT card
Graphic Card: Radeon HD 5970
PSU: CoolerMaster SilentPro 700W
PSU: Club3D 1000W

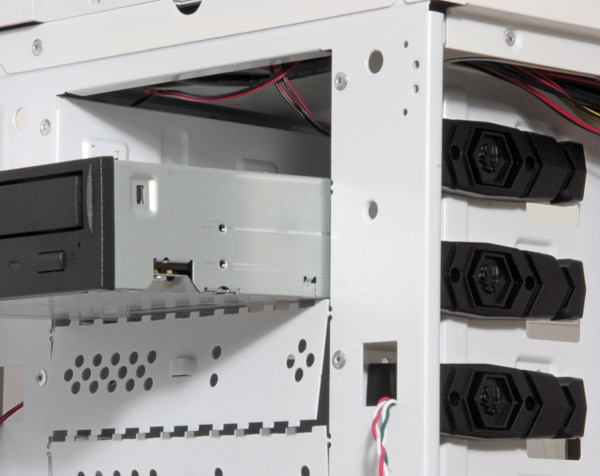
As the picture suggests, we couldn’t remove the mounted CPU cooler from the back. Although the CPU socket hole is pretty large, the MSI P35 Platinum’s CPU socket is positioned relatively high. We first blamed CoolerMaster’s cooler since it uses thick screws for 775 sockets. 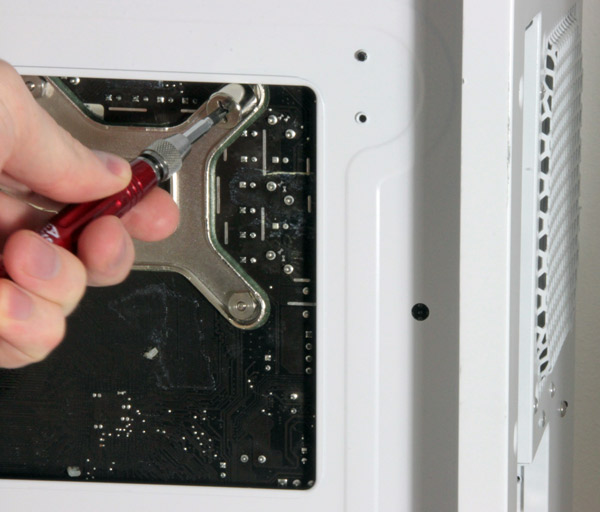
Unfortunately, it appears that this is not an isolated case as we had the same problem with EVGA’s X58 FTW 3 and Prolimatech Armageddon. It appears that BitFenix’s measurements were less than ideal and we didn’t even attempt to remove the Armageddon from the back. The following picture shows that it’s impossible. 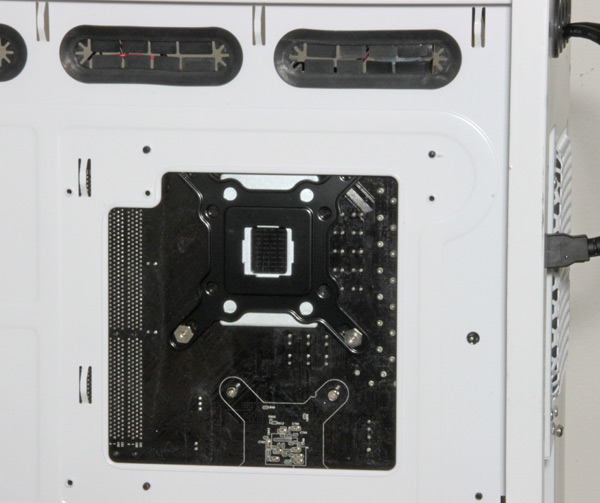
You can see several holes for cable management on the pictures and we must admit that some should’ve been wider than they are now. After we used one to route several basic cables, it was simply too narrow for other cables you might want to manage. 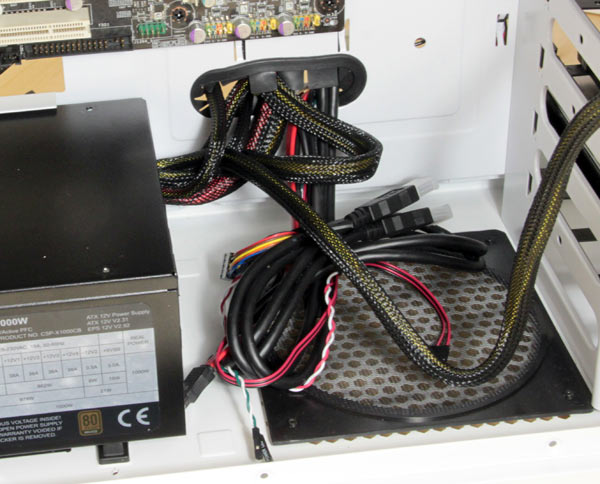
Still, we must say that the cable management notches are a nice touch. As you can see, there is plenty of room to hide the unnecessary cabling. 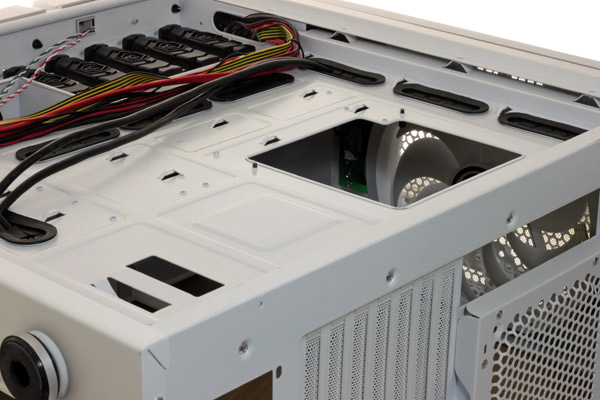
Another nice touch is the channel on the front panel, which can be used to route USB cables to the S3 compartment. This will definitely come in handy when you don’t want your mouse or keyboard stolen. You can route the cable(s) to the USB port(s) in the compartment and then lock the compartment to prevent theft. 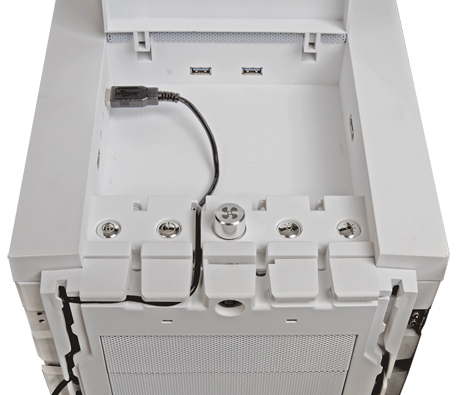
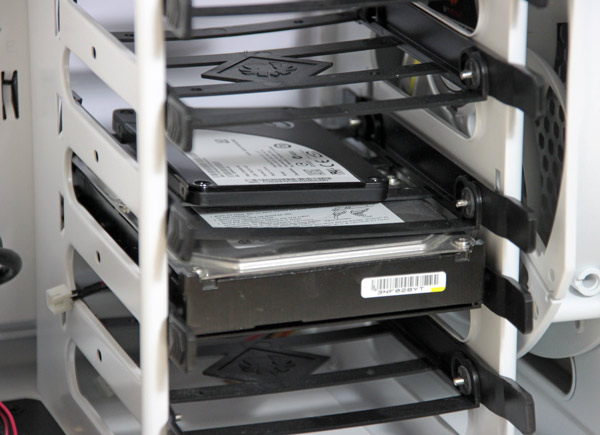
The HDD trays handled themselves pretty well with 3.5’’ drives, meaning they were fixed and were not vibrating. However, we didn’t like the way in which 2.5’’ drives behaved. Namely, the plastic trays are easily bent and it only takes a slight bump for the tray to fall out. However, BitFenix said that retail versions of the case will come with sturdier trays. The trays will take 3.5 and 2.5 inch drives. This means that Colossus will take up to eight 3.5 or 2.5 inch drives. 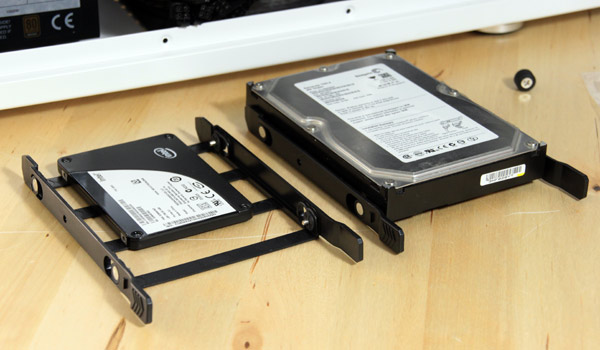
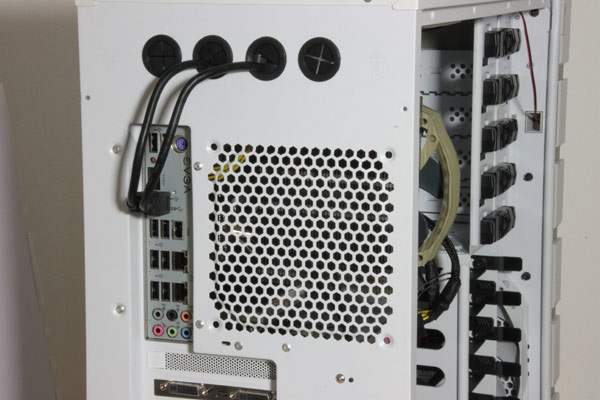
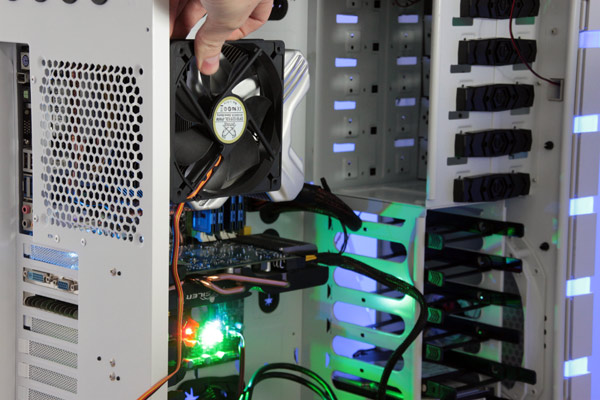
As we mentioned earlier, Colossus has two USB 3.0 connectors on the front panel. Naturally, this will require routing cables from the case’s control panel and connecting them to the ports on the motherboard’s I/O panel. The following picture shows the case’s USB 3.0 control panel and the way we routed the cables. 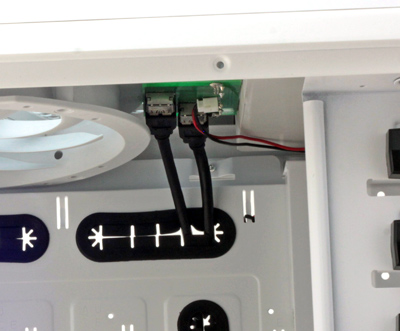
You can use water cooling holes to connect the USB 3.0, which is exactly what we did.
The rear panel will take a 14cm fan if you choose to mount it, but 12cm fan is also possible. Unfortunately, there are no holes intended for 12cm ones so you'll have to improvise by using the mesh - still, it can be done.
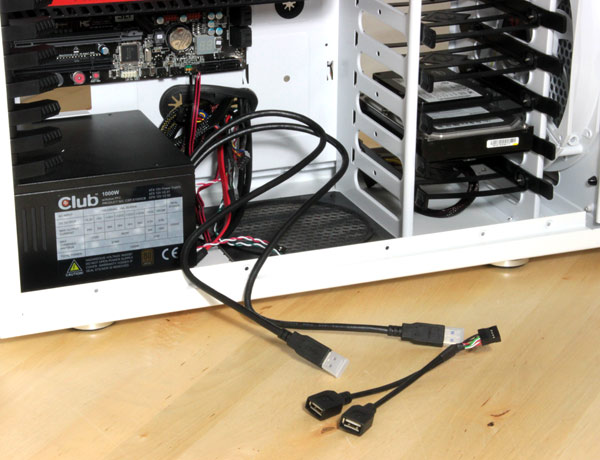
BitFenix thought about users who don’t have a USB 3.0 motherboard and thus included USB 2.0 adapter cable that allows for using USB 3.0 ports at 2.0 speeds. Colossus also comes with two external USB 2.0 connectors which are connected to the standard USB header on your motherboard.
The tool-free locking mechanism is made of plastic but it's massive and sturdy, i.e. it won't break any time soon. However, it does lack precision and we sometimes had to resort to stronger pushing in order to lock it. Thankfuly, when it locks there are no problems whatsoever. 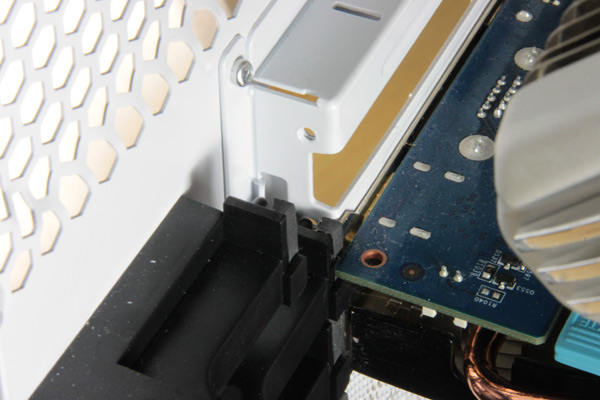
As far as space goes, there plenty to go around. As you can see, it's relatively easy to install an HD 5970, the biggest graphics card on the market.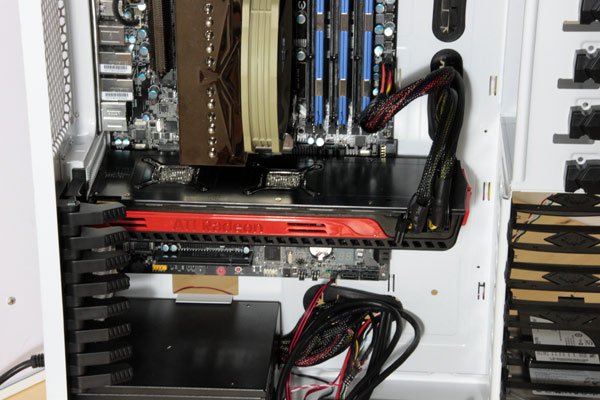
Colossus will take any large CPU cooler and not even the tall Prolimatech Armageddon with a massive fan managed to reach the side panel. 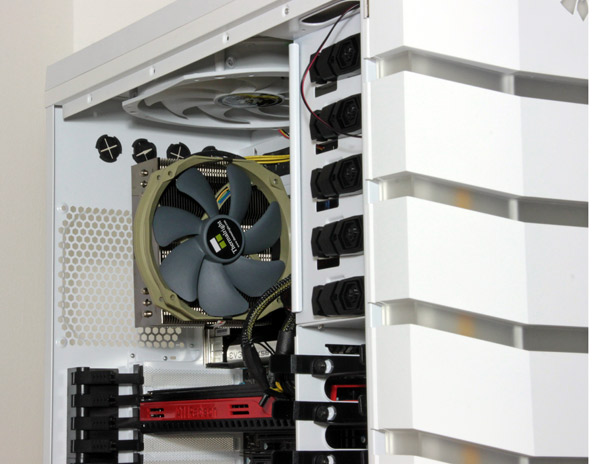
CoolerMaster Hyper Z600 cooler had about 2cm between it and the side panel.
As far as cooling performance and noise go, BitFenix did a good job – the included fans do a good job and are quiet.
As we said earlier, Colossus’ fan speed regulator can take up to six fans and will handle up to 15W. The connectors are in the back of the case. 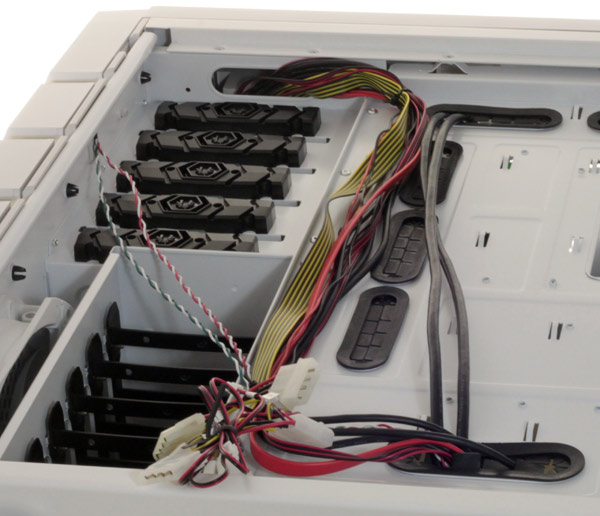
Users seem to have been interested in why the cables on their BitFenix chassis seem to short. BitFenix’s answer was:” Internal cables are bundled together on the production line before shipping. This is not in any way a recommended method of cable routing, but rather just a way to keep things neat and tidy in transit. We recommend users to cut the pre-assembled cable ties and route each cable separately to free up extra length and to ensure a better looking build.”
We must say that we didn’t like the lack of a printed manual as BitFenix only offers the pdf version. However, I found it really strange not hearing a mechanic click that indicates the locking of optical drives.
We’ve tested many cases and the tool free mechanisms usually follow one or the methods – either the drives need a push or require a handle tug to one side. BitFenix used a combination of these but the mechanism, as you can see from the picture, would not suggest so. 
So – you’ll have to press the button and while pressed pull the button left or right. Obviously, this is not something that can be done with one hand, as the mechanism doesn't operate very smoothly. Thankfully, the mechanism holds firm and your drive will not fall out regardless of what circus acts you may decide to perform with the case.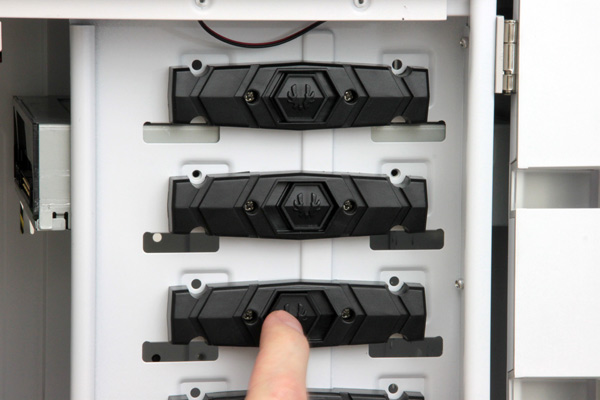
We saw that the topmost optical drive bay left scratches on the sides our optical drive, as the bay is pretty narrow. The other bays are fine.
We realized that the scratches were actually not caused by the mechanism, but rather a rogue screw which portruded from the mount. 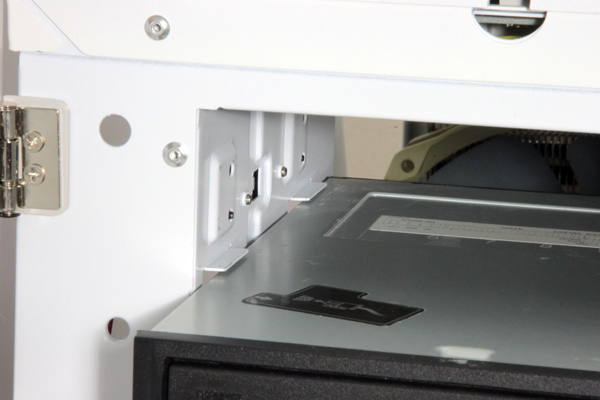
Another thing that may happen is for the fans and LEDs to remain on after you turn the computer off. BitFenix addressed this and said:”Early revision control PCBs on the Colossus exhibit this issue on certain motherboard/power supply combinations.In these cases, stand-by power (5VSB) from the PSU will cause the Colossus control PCB to wake up, or refuse to shut down entirely."
Depending on your setup, you can try the following options:
1. Turn off all stand-by power options in BIOS (such as, "Wake on LAN", "Keyboard PWR On" etc.)
2. Disconnect the extra USB3.0 power connector.
3. Turn on EuP/ErP features in the BIOS to ensure that stand-by power never exceeds 1W